
Hello, and welcome to Brian’s computer retreat! In this post, I’ll be continuing my Pippin series for #MARCHintosh, with a demonstration of how to make a CD-ROM designed to boot the Pippin.
The video version of this post will go live at Noon EST on 3/12/2021.
If you’d like to follow along at home, you’ll need:
- A Macintosh running the classic macOS, with a CD burner and a copy of Toast, or
- A computer capable of running SheepShaver, with the utilities linked in the description
- The starter disk images linked in the description
- The Pippin Kickstart CD by Blitter, linked in the description
- Blank CD-R media
- A Pippin
- Some time and lots of patience
In my next video, I’ll go into more detail about how I made the base image I’ve provided, though I think these instructions will be more useful for most people who have access to a Pippin.
First, you’ll need to mount the base image on your SheepShaver machine or your old Mac. Once mounted, you can open the disk and you’ll see several folders inside. The System Folder is based on the Pippin SDK CD, and includes a copy of the full Finder as well as necessary extensions and Quicktime. Since many Pippins only have 6MB of RAM, it is important to limit how many extensions you install. I have also installed At Ease as an alternative to the Finder, which uses less memory and gives you a more convenient interface for using the Pippin on a TV.
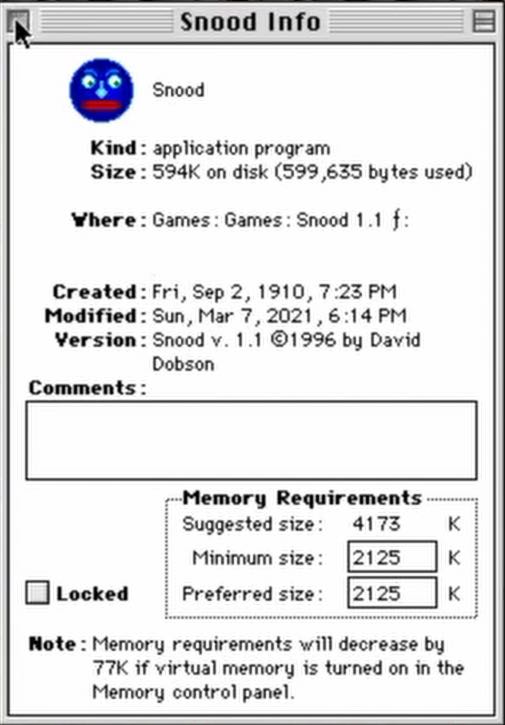
Before attempting to prepare any game for the Pippin, it is best to find the game and “get info” on it first. Check the “Memory” tab and see how much the game requests – on a standard Japanese pippin like my own, you’ll have about 3MB of RAM available to games once the system is loaded.
To add a game to the CD you’re building, first launch it on your development Mac so it can create any preference files it may need. Play through a bit of the game and get a feel for the control scheme and look at the settings for the game. Some games which would run fine on the Pippin, such as Tetris, use odd keys for control and provide no means of changing the control scheme. You can modify the AppleJack config with the AJ Control applet in the Apple Menu Items folder of the base image, though I have not had luck with it. The trackball is mapped to mouse movement, and by default both bumper buttons control the mouse button. The directional pad is mapped to the arrow keys, and the face buttons are mapped to Q, R, W, and E. The buttons on the bottom of the controller are mapped to quit, a key I couldn’t determine, and double click.

Once you’ve determined that the game can be controlled by the AppleJack, it’s time to copy it to the disk image. My preferred method is to store the games and their supporting files in a folder called “games”. It is also important to copy the preferences files from your System Folder > Preferences folder into the matching folder in the disk image’s system folder.
Some CD games may also work. If you’d like to try this, copy any data from the CD-ROM for the game into the disk image and set the disk image’s name to exactly match that of the CD-ROM game you’re hoping to configure. This worked for me with Journeyman, but it will be hit or miss.
Once you have all of the games you want to play on your Pippin in the Games folder, it’s time to make them available to At Ease. To do this, go through your Games folder and make an alias to each application you’d like to have available to At Ease. Then, put these aliases in the “At Ease Items” folder in the disk image’s system folder. Once you have everything in here and named as you’d like, choose “By Name” in the “View” menu bar to make your At Ease items alphabetical.


Next, I find that it’s best to rebuild the desktop on the disk image. If on a real Mac, you can just eject the disk image and open it up again while holding the Command and Option keys. For SheepShaver, it is best to reboot while holding the Command and Option keys. Allow the system to rebuild the desktop for each disk when it asks for permission.
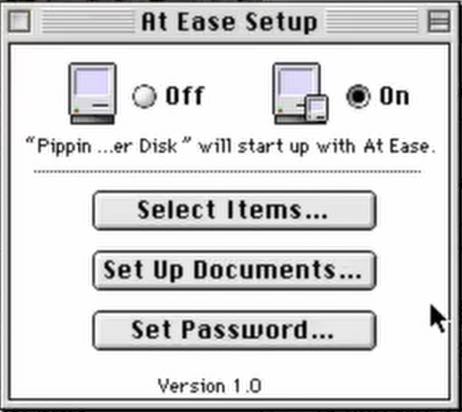
The final step before we create the bootable image of the disk is to configure At Ease. Open the At Ease Setup control panel from the disk image’s System folder, and select “On” to make the disk start up with At Ease. You may want to choose “Select Items” to ensure that the games you want available are showing up in the list correctly.
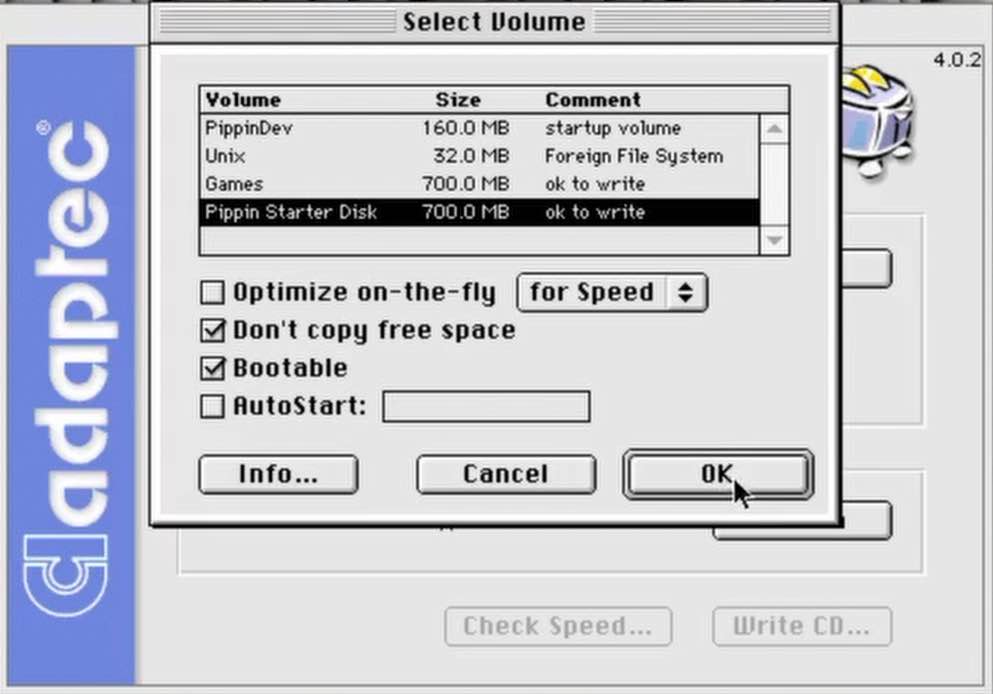
With all of this completed, you can now create the bootable disk. Open Toast and choose “Macintosh Volume” as the type of disk you’d like to create. Then, use the “Select” or “Data” button (depending on your version of Toast) to select the disk image as the source media. Make sure to check the “Bootable” box so you don’t end up with an extra coaster like I did. For a real Mac, you’re ready to write the disc directly to a recordable CD-R. If you’re using SheepShaver, you’ll want to select “File” > “Save As Disc Image” instead. Make sure to save this disc image to your Unix volume so you can access it from your host system. Once the disc image is saved, add “.toast” to the end of the file name so your host system recognizes it as a burnable disc image. Write the disc using your operating system’s disc image burning mechanism.
Once you’ve written a copy of your disc image, it’s time to test it on your Pippin. Be prepared for some things not to work – no matter how thoroughly you test on your hard disk, there will likely be some games that simply do not work. For example, Myst will not run off of write-protected media, like a recorded CD-R, even though the game itself should run fine and doesn’t have excessive memory requirements. Try to enjoy what you get working and not to stress too much about games that didn’t make it.
The first game I’m showing off here is Alien Invaders!. This is a Space Invaders clone, made with icons from Mac OS and Windows, which I have always loved. It uses the mouse for movement and the mouse button to fire, so it works perfectly on the Pippin.

Next up is Catacombs. This is clearly based on the Legend of Zelda, but seems a bit simpler in premise. For this game, I had to edit the controls to fit the AppleJack’s layout, which seems to have worked fairly well.

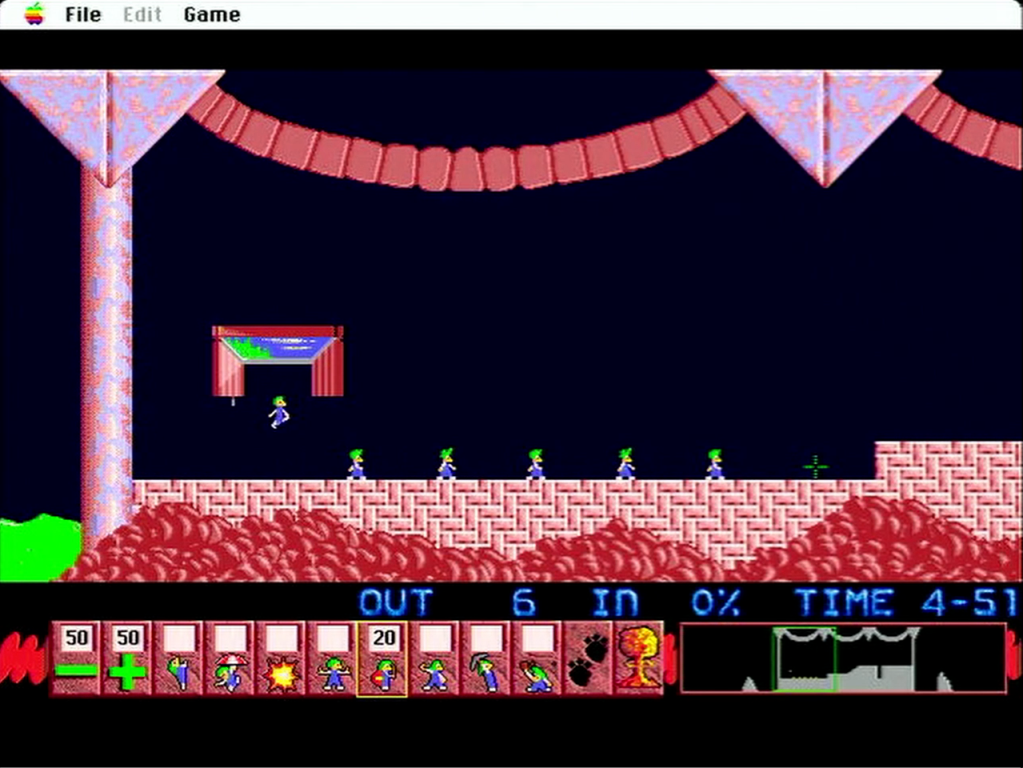
Next up is the Lemmings demo. The full version works perfectly, but I’ve installed this on the base CD I’m providing as a starting point for anyone who may want to give this a try. The game only uses the mouse for control, so it works just fine on the Pippin.
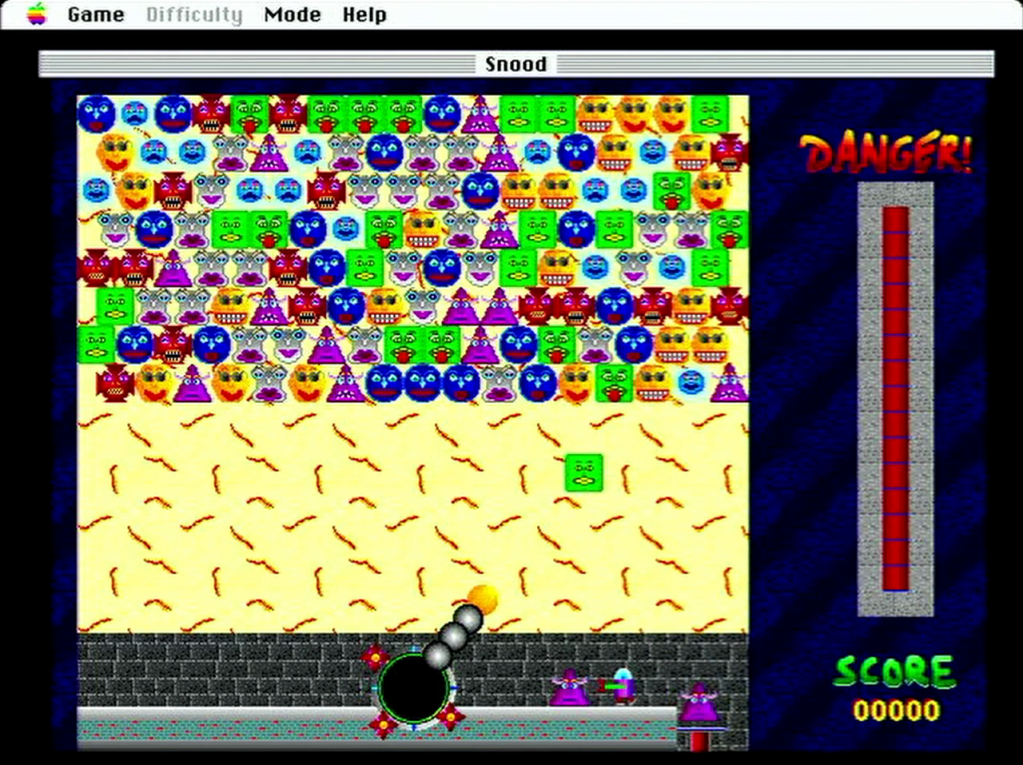
The final game is Snood, one of my favorite games for the vintage Mac. It works perfectly on the Pippin, as again, it just uses the mouse for control. There’s something very satisfying about the AppleJack trackball when playing Snood.
Thanks for reading this article! If you liked this one, please stick around – I’m still working on some more post about the Pippin and ways to make it more useful today. Also, keep an eye out for more #MARCHintosh content from other vintage creators on all sorts of social media platforms. See y’all next time!
For the base Pippin image only, to build a CD on a vintage Mac, visit https://www.icloud.com/iclouddrive/0YRZkyTUzdWdcp3b1LyVSai_A#pippindev.img.
For the SheepShaver build environment and the base CD image (you’ll need an Old World Mac ROM file), visit https://www.icloud.com/iclouddrive/0ndRHkICX_R-3_Ffkd6n6JKIg#Pippin_Development_for_SheepShaver.
The Pippin Kickstart CD v1.1 is available from Blitter’s site at https://blitter.net/blog/2021/02/09/pippin-kickstart-1-1/.

The iCloud linked items given an error when trying to access them: “This folder is unavailable. The owner stopped sharing, or you don’t have permission to open this folder.”
LikeLike
Hi David! Thanks for letting me know – while it looked like it should have been working on my side, I’ve changed the sharing settings a bit. Could you try downloading the files again and let me know if it works please?
LikeLike